
Vespa P125 Motor Rebuild Part 7
Removing the Motor Internal Parts
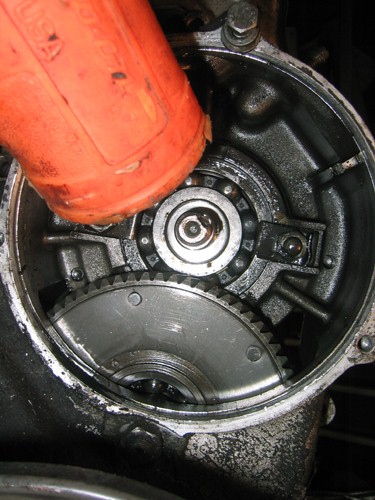
First, remove the crankshaft. Have a friend support the crankshaft on the flywheel side so it does not drop when it is pushed out of the motor. Then, using a rubber mallet, GENTLY tap the crankshaft from the clutch side. It press fits into the main bearing, but will pop free with a few taps of the mallet.
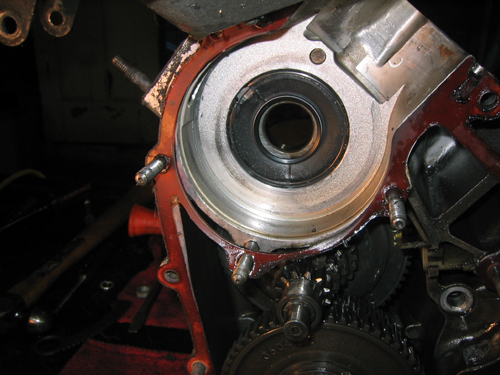
Now inspect the main seal and the main bearing. In this case, the bearing is (miraculously) fine, but the main seal is broken and cracked in two places. Remove the seal with a seal removal tool, or a screwdriver. Be careful not to damage the bearing.
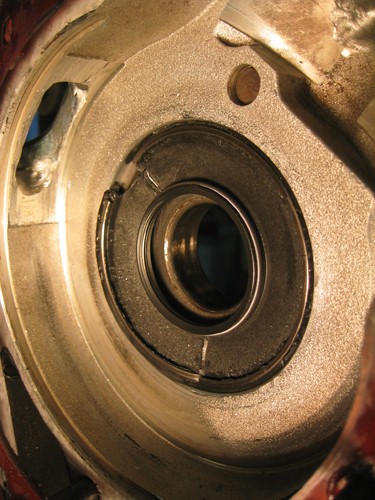
Now is a good time to inspect the rotary patch for damage. The rotary patch is the retangular raised area at the top of the crankshaft area of the case. (The rotary patch is in the top left of the photo above) The surface of the rotary patch should be smooth, and not have any deep gouges in it. Gouges or other severe damage to the rotary patch comprimise the sealing of the motor and will cause the motor to run poorly. If the damage is bad enough, the motor will not run in its stock configuration.
In this case, there is some slight scoring on the rotary patch, but it is not bad. We can therefore proceed with the rebuild. Note however that someone has used a rotary tool to open up the intake on this motor, so yours may look slightly different.

Previous Page |
Tech Home |
Next Page |